
Blanket Stitch Chat
After spending each morning in the vineyard or in the garden, I have been working on getting the instructions for 'Golden Leaves' ready. I discovered that I had used quite a few variations of Blanket Stitch and it made me think about just what a versatile stitch Blanket Stitch really is. It is fabulous and I use it all the time - you may have noticed if you have been following along here for a bit.
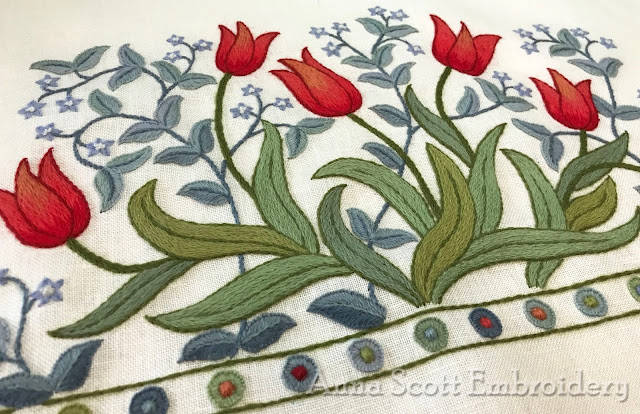
| 'Golden Leaves' 1. Top left, close together to cover sections of leaves. 2. Bottom left, spaced and interlocked for a 'net' effect. 3. Right, open for grass, slightly spaced and opposite directions for the trunk, close together for the lower leaf section. |
The basic Blanket Stitch is really quite simple, I have put the steps HERE if you need to see how to do it. What I find can be a little confusing is that when the stitches are worked close together, many stitch directories and patterns will refer it as `Buttonhole stitch`. I tend to ever only call it Blanket Stitch - my logic being that just because the spacing of the stitches is closer, doesn't make it a different stitch.
| For my crewel work I often use Blanket Stitch to fill narrow shapes - I love the effect of the neat `purl` edge that the stitches create. When you use Blanket Stitch like that or if you have very long rows, you are bound to have to join a new thread sooner or later. If you simply anchor the last stitch and then start a new thread, you get this little lump and you can pick where the join is. There is a little trick to joining a new thread when working this stitch - you may already know it. Blanket stitch - Joining new thread 2. Secure the new thread and bring it to the front inside the thread loop. 3. Pull the `old` thread tail until the loop anchors around the new thread. 4. Continue stitching - and there you are, an invisible join. The tail of the old thread can be secured later. |
Happy Stitching,
Anna X

That is a very helpful tip, Anna, thank you! I can think of many different situations where it will be handy. :)
ReplyDeleteI think this stitch is given different names because buttonholes are always made with small stitches close together to add strength and reduce fabric fray around an area which is under considerable stress whereas blankets need only be edged with large stitches placed further apart because there is virtually no stress along the straight edges. When someone says either stitch to me I immediately know whether the stitches should be close together or not but I agree that no matter which way it's sewn, it's an excellent stitch, as is your handy hint here which I must try and remember to use from now on! Thanks for the tutorial.
ReplyDeleteHelpful timely tip Anna Thank You!
ReplyDelete