
Detached leaf - soft edges
Detached Leaf ~ wire vein & soft edges.
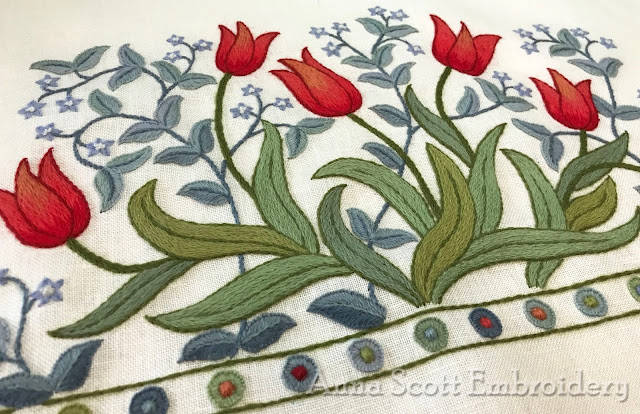
There are so many ways to embroider detached leaves and petals in raised embroidery. The method I am using for the detached leaves on Brother Rabbit are wired along the centre vain only, which leaves the edges soft. I use a good quality, smooth and firmly woven, quilter's muslin or cotton homespun.
This is how ...
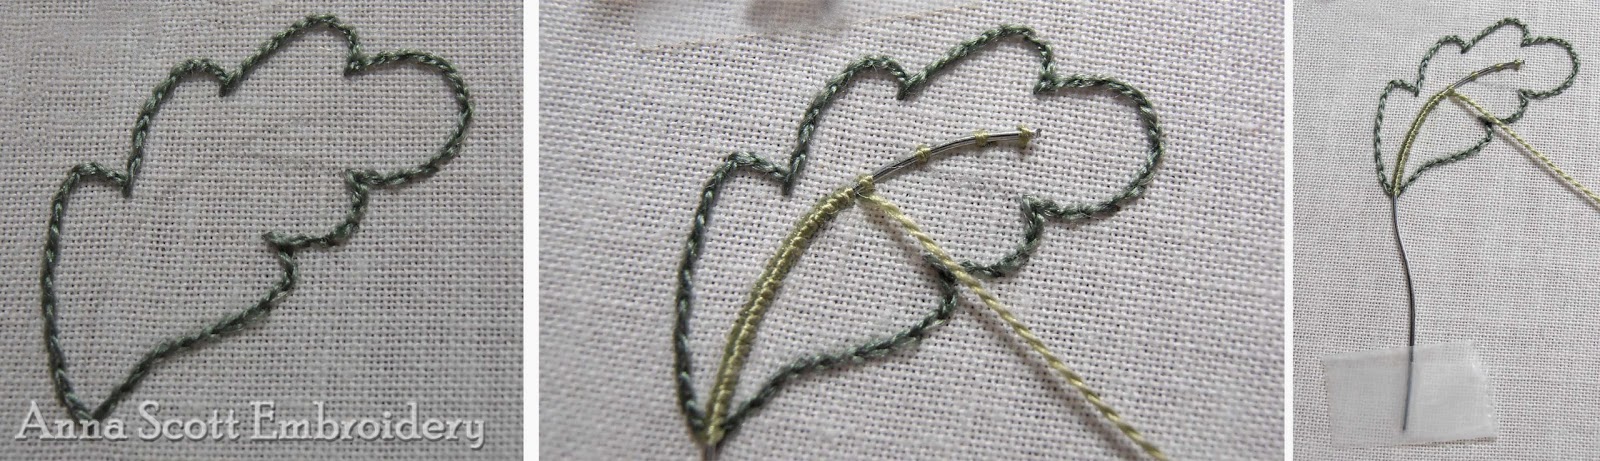
1. Outline the leaf in split stitch. These should be short and round.
You can use split back stitch if you are finding it tricky to split the stitches from the back, but it will result
in a slightly bulkier outline.
2. Centre vein. Cut a length of wire to fit the length of the vein + 2.5cm (1").
I use a 24-gauge beading wire. It is thicker than what I would use for an outline, but the extra thickness will provide sufficient stability to hold the leaf away from the surface.
3. To hold the wire in position, place couching stitches at small intervals down the length of it.
4. When you reach the base, cover the wire with overcast stitch, back to the top. Make sure the wire is
completely covered by placing the stitches closely side by side, incorporating the couching stitches as you
go. Try and angle your needle under the wire when you stitch - this will give the stitches a really nice, tight fit over the wire.
HINT - to help preventing my threads from getting snagged on the end of the wire, I wrap a bit of tape around the end.

5. Blanket stitch outline. Secure the thread inside the leaf and stitch a detached chain over the outline very
close to the base of the vein, but do not anchor the stitch.
6. Continue to cover the split stitch outline in very close blanket stitch. The split stitch should be completely
covered.
For these leaves, I would anchor the blanket stitch at the point between two lobes and then restart at the
same point. This gives a sharper point, than if you stitch a continues row.

7. Padding. Fill each side of the leaf with long straight stitches for a light padding before the final layer is
worked. Place the stitches along the length of the leaf so that they are perpendicular to the layer that will be stitched over the top.
8. Satin stitch filling. The satin stitch filling is worked in a way that hides the distinct edges of the blanket
stitch outline. The stitches are placed at an angle across the shape to imitate the direction of leaf veins.
To avoid creating a void, bring the needle to the front at an angle under the wired vein.
Take the needle to the back over the covered split stitch, but INSIDE the purl edge of the blanket stitch.
- that last bit sounds a lot trickier than it really is!

HINT - I always begin satin stitch midway along a shape - it makes it so much easier to get the correct stitch direction.
Happy Stitching,
Anna

Thanks for this tutorial. The laugh is on me :) As I read the blog entry I was thinking but how do you do this? Then I realised there was a second part. The teacher at school was always right - 'always read to the end of the chapter before asking questions'. :) :)
ReplyDeleteLOL - that is funny - I too am terrible at not reading to the end. In fact I am a real 'if all else fails - read the instructions' kind of girl.
DeleteI deliberately keep tutorials as a separate post so that they are easier to file and search for later on.
Happy stitching
fab tutorial, thank you!
ReplyDeleteWonderful post, so helpful to see how this technique is done, with such gorgeous results! Chrissie x
ReplyDeleteYour work is absolutely beautiful. Thank you for this tutorial - I can't imagine I'll ever quite get there, but it's lovely to see how this is done!
ReplyDelete