
Blanket stitch leaves - part one
I am really glad (and a little overwhelmed) by the many comments on my blanket stitch leaves the other day - I also found it very inspiring, so I sat down and stitched a tree. Blanket stitch is such a versatile stitch and I use it all the time, more and more in fact. Maybe you will feel inspired too.

I scribbled this little tree of leaves straight onto the fabric and you could easily do the same. If you don't feel like drawing your own leaves, you can download the pattern here FREE PATTERN DOWNLOAD.
The top two leaves are stitched in an Open Blanket stitch where the 'purl' edge of the stitches is placed along the outer edges. I start these from the base and the angle of the stitches naturally form the ribs or veins of the leaf. When I stitch the second side, I place the stitches into the same holes along the centre vein.


When I teach, I often find that many only ever work blanket stitch in one direction (left to right, or right to left). If that is you, it might take a bit of getting used to, to stitch it both ways but it is well worth the effort and you will get so much neater points and evenly slanted stitches.

I did one leaf two strands - the other with three. Adjusting the weight of your thread and the spacing of the stitches will change the appearance of the leaf - something to play with...
Then, if you stitch with the purl edge along the centre vein, the leaf ends up quite differently. These are best to stitch from the top to the base. The second side is done the same way - and you end up with a neat rib down the middle. I used a line of stem stitch to neaten the edges.


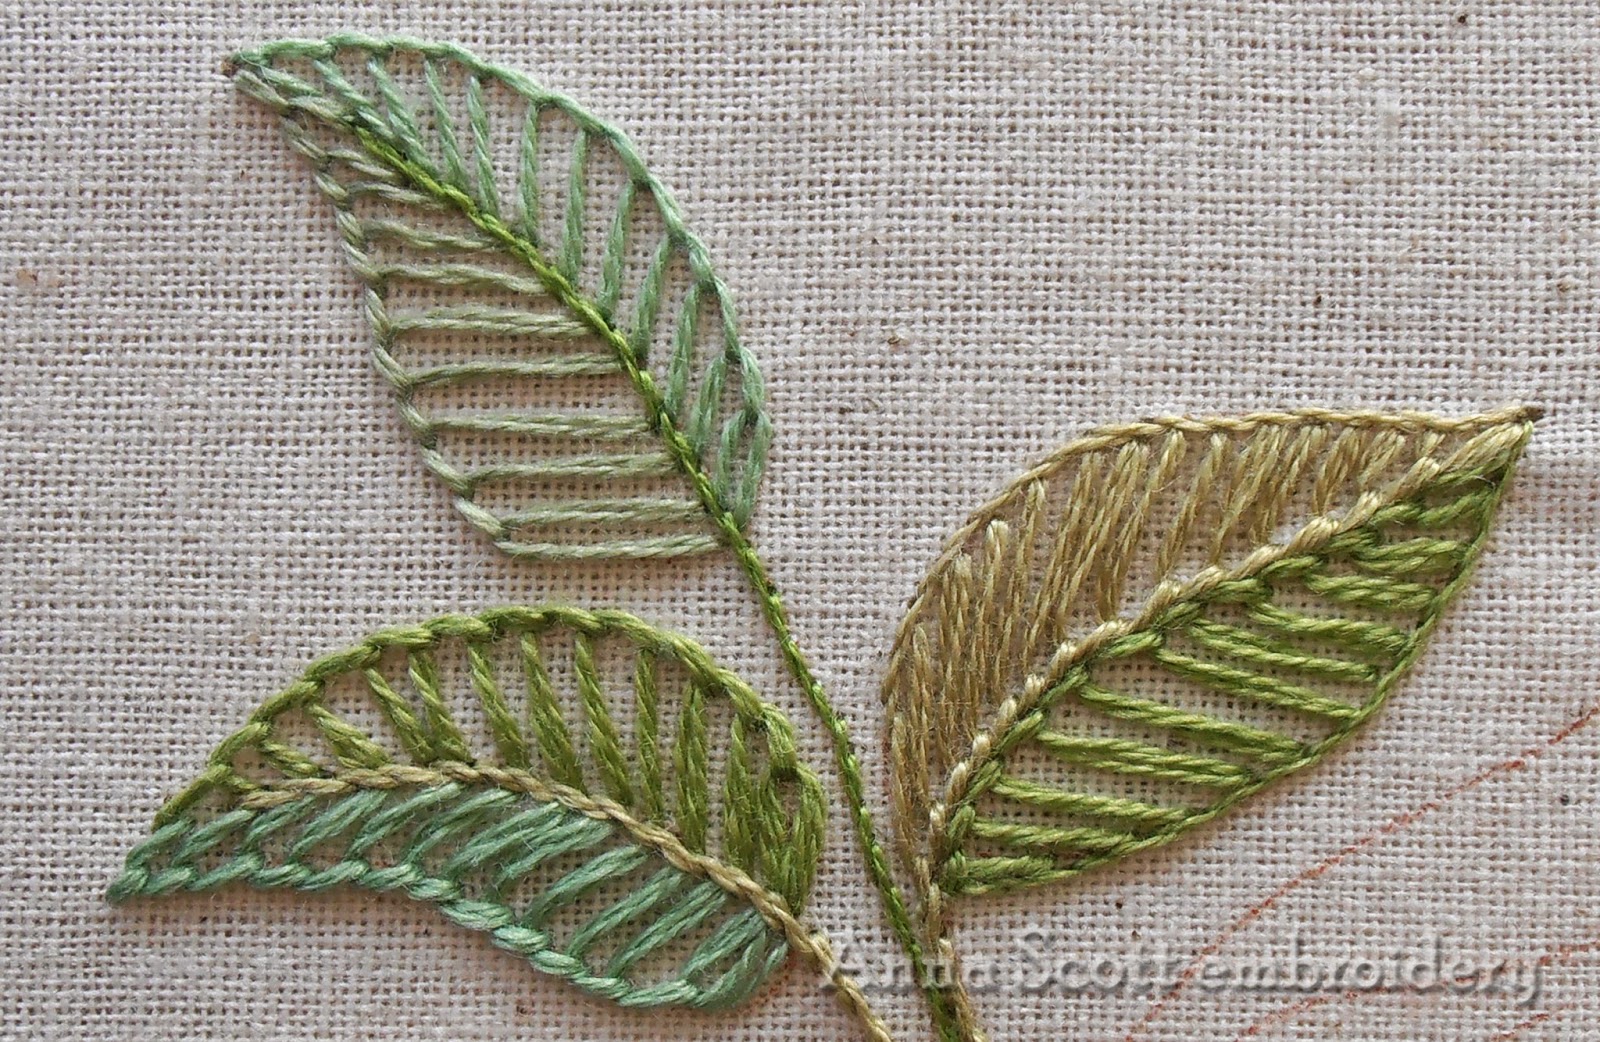 You can finish the centre line of the other two leaves with a line of stem stitch or perhaps chain down the middle.
These Open Blanket stitch leaves are so quick - and rather effective really. I like that they don't cover the fabric completely, it adds a nice dimension to the design.
I did finish my little tree this evening, but the light was fading and the pictures taken inside under the lamp are shocking to say the least - so you will have to wait for the rest of my tree - Sorry.
Until then - Happy stitching,
Anna
I scribbled this little tree of leaves straight onto the fabric and you could easily do the same. If you don't feel like drawing your own leaves, you can download the pattern here FREE PATTERN DOWNLOAD.
The top two leaves are stitched in an Open Blanket stitch where the 'purl' edge of the stitches is placed along the outer edges. I start these from the base and the angle of the stitches naturally form the ribs or veins of the leaf. When I stitch the second side, I place the stitches into the same holes along the centre vein.
When I teach, I often find that many only ever work blanket stitch in one direction (left to right, or right to left). If that is you, it might take a bit of getting used to, to stitch it both ways but it is well worth the effort and you will get so much neater points and evenly slanted stitches.
I did one leaf two strands - the other with three. Adjusting the weight of your thread and the spacing of the stitches will change the appearance of the leaf - something to play with...
These Open Blanket stitch leaves are so quick - and rather effective really. I like that they don't cover the fabric completely, it adds a nice dimension to the design.
I did finish my little tree this evening, but the light was fading and the pictures taken inside under the lamp are shocking to say the least - so you will have to wait for the rest of my tree - Sorry.
Until then - Happy stitching,
Anna
Ohhh.. thanks Anna , I find very good your idea and in the top of the free pattern I find very educative just looking a your color combination in the leaves which give me great ideas how to use the colours in my work too.
ReplyDeleteI've always been a little stuck on trying to get my leaves to look like this - thank you fro the wonderful tutorial!!
ReplyDeleteQue lindo e fåcil de fazer. O efeito final também é ótimo.
ReplyDeleteMuy delicado el trabajo de bordarlas hojas con esa puntada, gracias por mostrar el paso a paso para lograr el efecto deseado en un ramo de flores.Siempre había querido hacer las hojas en puntadas diferentes a las que pocas que conpocía. Gracias, saludos y muchas bendiciones reciba del Señor Dios
ReplyDeleteABSOLUTELY BEAUTIFUL! THIS WILL CERTAINLY HELP ME IN MY NEXT PROJECT
ReplyDeleteAs a beginner, I feel that this tutorial is missing some vital parts, but I love so much and want to do it! Is it possible you could add more pictures!?
ReplyDeleteNew at this...how do u do a pearl stitch?
ReplyDelete