
Fine raised stems

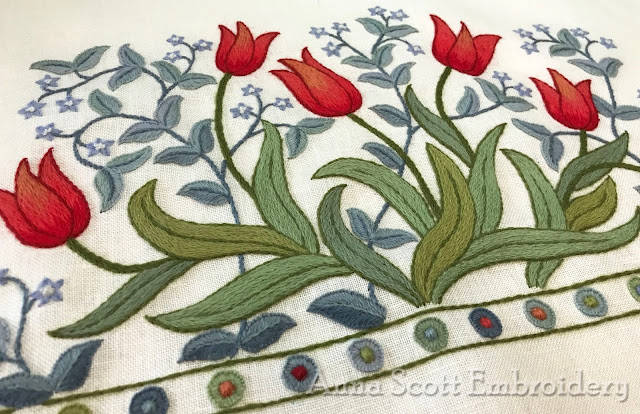
One of other things I am working on is a new raised embroidery piece for a class later in the year. This one is kind of a 'sister' piece for the Sweet Honeysuckle I did a little while ago. I don't want to copy everything from the first piece, but at the same if something works well, I can see no reason to change it and I really like these slightly raised stems with a bit of fine gold sparkle.

They are not as tricky as them may look so I thought I would show you how to do them.
FINE RAISED STEMS
I use two strands of stranded silk for these stems, but cotton will work exactly the same. Use three strands if you want thicker stems.
 1. Start with a row of stem stitch along the marked line. It is important you keep the stitches relatively short. When using 2 strands, my stitches are approx 3mm (1/8") and a little shorter around tight curves.
I use my needle to push in against the existing row to make sure I get them really close.
It doesn't matter if the stitches don't sit side by side, in fact it is better if they are slightly off-set.

Whip the two rows of stem stitch together. The needle does not go through the fabric, just skims under the stitches.
Place the whipping stitches really close together and make sure the two strands in the needle are not twisted - they should fall neatly side by side.
The whipping pulls the two rows of stem stitch together and raises the line off the fabric.

This time use a pointed needle (10 sharp or 9 crewel).
Whip over the top of the previous stitches and space the whipping out, so you get a candy stripe effect.
... and viola... a fine raised stem with a bit of sparkle.
Of course, fine metallics are always a bit of a challenge because the metal, or foil breaks so easily.
I thought I got it right....

... but a closer look show it has broken in a spot where I will not be able to hide it with other embroidery.
Looks like I will need to do a wee bit of 'reverse stitching' before I move on.
Best stitches,
Anna X

Thanks for the tutorial pa the "Fine raised stem stitch". A new stitch for me to play with!
ReplyDeleteHi Shirlee, I am glad you like it :-)
DeleteThanks for the great explanation on raised stems. It was very easy to follow. Any chance of a tutorial on the leaves? They are so pretty. It looks like you did them two different ways and both are lovely.
ReplyDeleteWill keep it in mind. You never know......
Deletemerci pour cette methode pour faire les tiges.. qui sont belles, rondes...
ReplyDeleteMerci beaucoup
I really like the added sparkle you added around the raised stem stitch. Just a bit to catch the eye!
ReplyDelete